Your cart is empty
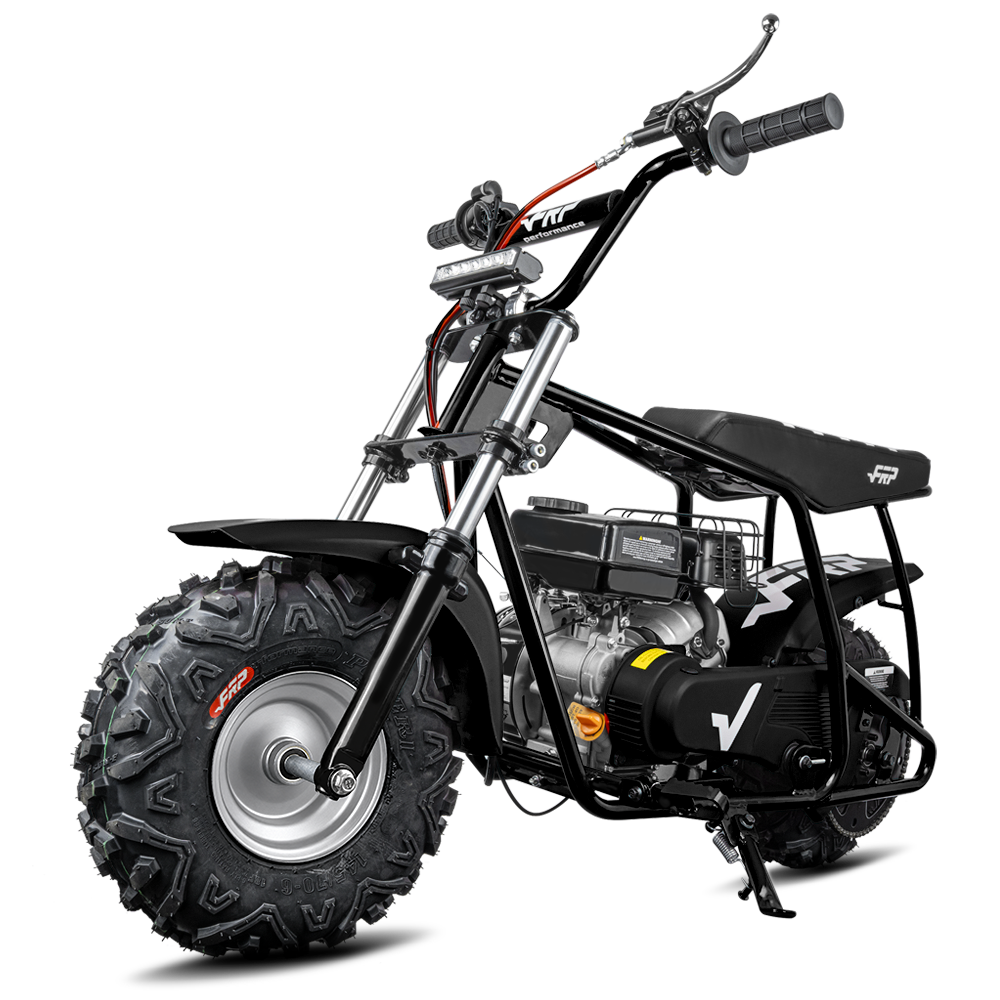
return to shopThe FRP Moto FX140 is a 140cc single-cylinder, oil-cooled, 4-stroke dirt bike with a 4-speed manual clutch transmission, front and rear disc brakes, kick and electric start, and a maximum load of 264.55 lb (120 kg). The manual asks you to break the engine in for the first 800 km (500 miles), check the bike before every ride, and use 90 octane or higher unleaded fuel with 10W40 or 10W50 oil. Everything on this page comes from the FX140 manual (revision dated 02/09/26, 17 in front / 14 in rear wheel version).
Download the PDF manualFX140 product page
FX140 quick facts
The FX140 is a 140cc oil-cooled 4-stroke with a 4-speed manual clutch, a 33.86 in seat height and a 264.55 lb (120 kg) maximum load. Specifications below are from the manual's technical specification page.
| Item | Specification |
|---|---|
| Engine | Single-cylinder, 140cc, 4-stroke, oil-cooled, overhead valve |
| Bore x stroke | 56 x 57 mm |
| Rated power | 8.2 kW at 7500 rpm |
| Max. torque | 10.2 N·m at 6000 rpm |
| Max. no-load rpm | 9500 rpm |
| Start | Kick start and electric start |
| Transmission | 4-speed manual clutch |
| Carburetor | PZ26 |
| Brakes | Hydraulic disc, front and rear (DOT 4 fluid) |
| Tires | Front 70/100-17, rear 90/100-14, off-road, bias-ply, tube type |
| Tire pressure (cold) | 15-18 psi (104-124 kPa) front and rear |
| Max load | 264.55 lb (120 kg) |
| Net weight | 170.86 lb (77.5 kg) |
| Fuel capacity | 1.43 gal (5.4 L) |
| Fuel | Unleaded gasoline, 90 octane or higher; never mixed with oil |
| Engine oil | 10W40 or 10W50 only |
| Seat height | 33.86 in |
| Wheelbase | 49.21 in |
| Length x width x height | 70.1 x 30.7 x 44.1 in |
| Max permissible gradient | 30 degrees |
| Rider age | Minors ride under adult supervision; see the kids dirt bike guide for fit by model |
Wheel-size variant: this manual describes the 17 in front / 14 in rear FX140 only. It gives no separate table for any other wheel size. For other FRP models see all FRP user manuals.
What is in the box and tools you need
The manual does not include a packing list or an assembly tool list, so check the box contents against your order confirmation. The manual does name the tools below for owner maintenance.
- Tire pressure gauge (pre-ride check and tire pressure).
- Funnel and drain pan (fuel and oil service).
- 5/8 in socket or wrench (spark plug), spark plug gap gauge, 220-400 grit sandpaper (cleaning a fouled plug).
- Phillips screwdriver (brake master cylinder cap), 8 mm wrench (brake bleeder valve).
- Spoke wrench or small adjustable wrench (spokes), needle-nose pliers (chain master link clip).
- Tachometer (idle speed), cable lubricant, chain lube or 80W/90W gear oil, air filter oil.
- Fresh DOT 4 brake fluid from a sealed bottle.
The manual states that the spark plug, valve re-seating and fuel system items in the maintenance schedule need special tools and moderate to high mechanical skill. If you are not comfortable with a job, contact FRP Moto support (see the end of this page).
FX140 assembly
The FX140 owner manual does not contain written assembly steps. FRP Moto covers assembly in a video, "How to Assemble Your FRP FX140 Dirt Bike" (3 minutes 11 seconds). Use the video for assembly, then continue with the pre-ride checklist below before the first start.
Safety: the manual says users are responsible for checking that all screws, fasteners and structural parts are secured and working before each use. After assembly, check every accessible nut and bolt, and use the torque values in the service section for the parts the manual lists.
Watch on YouTube: How to Assemble Your FRP FX140 Dirt Bike
The manual says the throttle and acceleration settings are factory set and should not be adjusted by the user, and that unauthorized modifications are prohibited.
Controls and how to start the FX140
To start a cold FX140: key ON, transmission in neutral, fuel tap ON, choke up, front brake lever held, throttle open no more than 1/4, then press the electric start button (or kick). After about 1 minute push the choke down, then warm up for about 5 minutes.
Control layout
- Left handlebar: clutch lever (6-position adjustable), engine stop/run switch, and the headlight switch and dashboard buttons described in the manual.
- Right handlebar: front brake lever (6-position adjustable), throttle, electric start switch.
- Foot controls: shift lever on the left of the engine, rear brake pedal and kick start lever on the right, side stand.
- Fuel tap: OFF closes fuel flow to the carburetor; ON lets fuel flow. Fuel cap: turn counter-clockwise to open, clockwise to close, with the breather tube installed.
- Choke lever: up is closed, for starting. Push it down after about 1 minute of running.
Starting procedure (electric start), cold engine
- Turn the key switch to ON.
- Make sure the transmission is in neutral.
- Turn the fuel tap to ON.
- Lift the choke lever up.
- Press and hold the brake lever on the right side of the handlebar.
- Open the throttle no more than 1/4 of the way.
- Press the start button, and release it as soon as the engine starts.
- After about 1 minute of engine operation, push the choke lever down.
- Warm up for approximately 5 minutes, then you are ready to ride.
Starting procedure (kick start), cold engine
Repeat steps 1 to 6 above, then extend the kick start lever and, from the top of the stroke, kick firmly through to the bottom in one smooth continuous motion. After about 1 minute push the choke down, then warm up for approximately 5 minutes.
For a warm engine, the manual says to repeat the cold-start steps 1, 2, 3, 5, 6, 7 and 8 (which leaves out the choke).
Flooded engine
If the engine fails to start after repeated attempts it may be flooded: press the engine stop switch, open the throttle completely, kick the engine over several times (kick start only), remove and dry the spark plug if necessary, then once it starts open the throttle to 1/4 and blip it a few times to clear the excess fuel.
Shifting and braking
The bike has four forward gears. Close the throttle before every shift. To pull away, close the throttle, lift the shift lever from neutral to first, and open the throttle slowly until the clutch grabs. Neutral sits between first and second: from first, lift the lever about half the distance needed for second. Downshift when the engine lugs at low rpm. Use both brakes together: the manual states the front brake provides about 70 percent of stopping power and the rear about 30 percent. Put your left foot down first when stopping, and pull the clutch lever when stopping unless in neutral.
Warning: never start the engine in gear, never run the engine in an enclosed or poorly ventilated space (carbon monoxide), and do not coast or tow the bike for long distances with the engine off.
Stopping and parking
Shift to neutral, hold the red stop switch on the left handlebar until the engine stops, lower the side stand on flat, level ground and turn the fuel tap OFF at the end of the day. For long storage, turn the fuel tap OFF while the engine is running and cycle the throttle until the engine stops, to use up the fuel in the carburetor.
FX140 pre-ride checklist
Before every ride, check tires, spokes and rims, leaks, engine oil, fuel, drive chain, brake hoses, nuts and bolts and the spark plug, then check throttle and brakes once seated. The manual calls this inspection a must because off-road riding is hard on the bike.
Before you get on
- Tires: check pressure with a gauge (15-18 psi cold) and look for damage or excessive wear.
- Spokes and rims: all spokes tight, rims not bent.
- Leaks: look under the bike for engine oil or gasoline.
- Engine oil: check level and add if needed. Use only 10W40 or 10W50.
- Fuel: check level and make sure the gas cap is tight.
- Drive chain: check condition and slack, adjust and lubricate if needed, check the guide and roller for wear.
- Brake hoses: check for leaks.
- Nuts and bolts: tighten any that are loose.
- Spark plug and cap: plug not loose, cap pushed on and secure.
After you get on
- Throttle: check free-play, rotate it, and confirm it snaps fully closed in all steering positions.
- Brakes: step on the rear brake and squeeze the front lever to confirm both work.
Warning: failing to correct a problem before riding can cause a crash. The manual also says the bike must not be ridden at night. If a child helps with any inspection, an adult must supervise closely.
FX140 break-in procedure
The first 800 km (500 miles) is the break-in period. Keep engine speed below 3000 rpm for the first 800 km, below 5000 rpm up to 1600 km (1000 miles), and below 8000 rpm after that, and vary the engine speed rather than holding one throttle setting.
| Distance | Maximum engine speed |
|---|---|
| Initial 800 km (500 miles) | Below 3000 rpm |
| Up to 1600 km (1000 miles) | Below 5000 rpm |
| Over 1600 km (1000 miles) | Below 8000 rpm |
- Vary the engine speed: this lets parts load (aiding the mating process) and unload (letting them cool). Put some stress on the engine, but do not load it too much.
- Before the first start: fuel with unleaded gasoline of 90 octane or higher and check the oil level (10W40 or 10W50). After an oil fill or change, let the oil circulate for 2-3 minutes before riding.
- Warm-up: about 5 minutes after start, and do not rev a cold engine or ride it at full load.
- Suspension: ride about 2 hours on the original settings before adjusting the shock.
- Spokes: during the first 100 miles spokes loosen faster as parts seat, so re-check spoke tightness.
- New tires: for the first 160 km (100 miles), increase lean angle gradually and avoid hard acceleration, cornering and braking.
- First service: the schedule below lists an engine oil replacement at 750 km.
Note: ride slowly for 3-5 minutes after start-up and before stopping, and do not stop the engine while the choke is closed.
FX140 maintenance schedule
The FX140 schedule is based on odometer distance in kilometers: engine oil is replaced at 750 km and every 3000 km after that, the spark plug is replaced at 6000 and 12000 km, and the oil filter is cleaned and the fuel filter replaced at every interval from 3000 km. Service more often in wet or dusty conditions.
Key: I = inspect (clean, adjust or replace if needed), C = clean, A = adjust, L = lubricate, R = replace. Items marked * need moderate to high mechanical skill; ** also need special tools.
| Item | 750 km | 3000 | 6000 | 9000 | 12000 | 15000 | Every ride |
|---|---|---|---|---|---|---|---|
| **Re-seating valve | I | I | I | I | I | ||
| **Spark plug | I | R | I | R | I | ||
| **Fuel system | I | I | I | I | I | ||
| *Engine oil | R | R | R | R | R | R | I |
| *Valve gap | A | A | A | A | A | ||
| *Idle speed | A | A | A | A | A | ||
| *Oil filter | C | C | C | C | C | ||
| *Fuel filter | R | R | R | R | R | ||
| *Air cleaner | C | R | C | R | C | ||
| *Drive chain | I, L | I, L | I, L | I, L | I, L | ||
| Fuel line | I | I | I | I | I | ||
| Throttle operation | I | I | I | I | I | ||
| Brake shoes / pad wear | I | I | I | I | I | ||
| Brake system | I | I | I | I | I | ||
| Clutch | I | I | I | I | I | ||
| Brake fluid | I | I | I | I | I | ||
| Nuts, bolts, fasteners | I | I | I | I | I | ||
| Wheel / tire | I | I | I | I | I |
The oil-change procedure in the manual also recommends replacing the oil after every 15 hours of riding. If you track hours, follow whichever comes first. Use only genuine replacement parts purchased directly from FRP.
FX140 service values and procedures
Key FX140 service values from the manual: throttle free-play 3-5 mm, idle 1500 +/- 100 rpm, clutch free-play 10-15 mm, chain slack 8-10 mm, spark plug gap 0.5-0.8 mm, rear axle nut 85 ft-lb (115 N·m), oil drain bolt 11 ft-lb (15 N·m).
| Item | Value from the manual |
|---|---|
| Fuel fill level | Fill to about 2 in from the top of the tank; breather tube connected to the cap |
| Engine oil grade | 10W40 or 10W50; no additives, no graphite or molybdenum oils, no "energy conserving" API-logo oils. The manual gives no oil quantity; fill to the upper dipstick mark and do not overfill |
| Oil level check | Idle 3-5 minutes, wait 2-3 minutes, bike upright, dipstick inserted but not screwed in, level between the two marks |
| Oil drain bolt torque | 11 ft-lb (15 N·m) with a new sealing washer |
| Throttle free-play | 3-5 mm (0.10-0.20 in), set with the upper adjuster |
| Idle speed | 1500 +/- 100 rpm, engine warm, in neutral, bike upright |
| Clutch free-play | 10-15 mm; lever adjuster first, integral cable adjuster if the clutch slips or will not engage |
| Spark plug | Gap 0.5-0.8 mm; hand-thread first, then 5/8 in socket. Plug type A7TC in the emissions parts list |
| Brake fluid | DOT 4 only; level not below halfway in the sight glass |
| Brake pads | Replace both pads at 1 mm thickness; never replace only one |
| Tire tread | Replace before tread depth reaches 0.12 in (3 mm) |
| Tire pressure (cold) | 15-18 psi (104-124 kPa) front and rear |
| Drive chain slack | 8-10 mm vertical movement midway between the sprockets |
| Rear axle nut | 85 ft-lb (115 N·m) |
| Chain lube | Chain lube or 80W/90W gear oil, not motor oil |
| Rear shock | One adjuster for compression and rebound. The manual says the shock ships at its softest setting. Clockwise makes compression harder and rebound slower. Front forks: no adjustments |
Torque specifications
| Fastener | N·m | ft-lb | Quantity |
|---|---|---|---|
| Lever clamp bolts | 35 | 26 | 4 |
| Breather hose cap | 16.2 | 12 | 1 |
| Swing-arm nut | 81 | 60 | 1 |
| Handlebar clamp bolts | 40.5 | 30 | 4 |
| Brake-oil nut | 17.3 | 13 | 1 |
Air filter
Loosen the clamp and remove the filter, replace it if the element is torn, wash it in non-flammable solvent then hot soapy water, rinse and let it dry fully, saturate it with air filter oil and squeeze out the excess, refit without tearing it and tighten the clamp. Service more often in wet or muddy riding.
Drive chain
Check slack on level ground with the engine off and in neutral. To adjust: loosen the rear axle nut and both lock nuts, turn the adjusting bolts (equal gap on both sides), tighten the axle nut to 85 ft-lb and re-check. Replace the chain once the axle is as far back as it goes and slack remains. Replace sprockets with a new chain, join the ends with the master link and fit the clip with its closed end facing the direction of forward wheel rotation. Clean with a non-flammable solvent such as kerosene, never gasoline.
Brakes
Both brakes are hydraulic discs. Add only fresh DOT 4 from a sealed bottle, do not overfill, and keep fluid off paint. If the lever feels soft, bleed air: pump the lever 4-6 times and hold, loosen the bleeder valve with an 8 mm wrench, tighten it, release the lever, and repeat until no bubbles appear and the lever is firm.
Wheels and cleaning
Feel all spokes for looseness, and spin each raised wheel to check for wobble. Replace the inner tube whenever a tire is replaced, and have the wheel balanced afterward. For cleaning the manual recommends mild detergent and a garden hose, and says never to wash the bike with the engine running. Avoid high-pressure washers on wheel hubs, muffler outlet, under the seat, engine stop switch, under the tank, drive chain and carburetor. Lubricate the chain after washing once dry.
FX140 troubleshooting
If the FX140 will not start, work in this order: fuel reaching the carburetor, then spark at the plug, then cylinder compression. Do not touch the plug or cap while kicking or cranking, because you can receive an electric shock.
| Symptom | Check | Likely causes listed in the manual |
|---|---|---|
| Engine will not start, no fuel at carburetor | Fuel tank, tap, line and breather hose | Clogged fuel line or filter, clogged fuel valve, clogged tank breather hose, stuck carburetor float |
| Engine will not start, fuel present | Spark plug condition and spark test (plug in cap, threads on engine metal, kick; you should see a blue spark) | Flooded engine, choke closed, throttle stuck open, dirty air filter, fouled or faulty plug, bad plug cap or wire, ignition coil, CDI box, magneto, engine stop switch, loose or corroded connectors |
| Spark good, still will not start | Compression: kick slowly, you should feel firm resistance that abruptly softens | Worn cylinder or rings, stuck valve or valve timing, leaking head gasket |
| Engine starts then stops quickly | Choke and carburetor | Improper choke operation, dirty or misadjusted carburetor, intake leak, ignition timing, dirty fuel |
| Engine quits while riding | Fuel valve ON, breather hose, fuel flow, then spark plug and cap | Fuel obstruction, loose plug cap, no spark (replace the plug first) |
| Poor power or poor acceleration | Air filter, fuel line or filter, muffler or spark arrester, choke, breather hose; then spark plug, oil level and compression | Clogged parts, dirty carburetor or contaminated fuel, worn rings or valve issues |
| Engine overheats | Overheating check in the diagnostic flow | Carbon build-up, poor fuel, clutch slipping, lean mixture or wrong octane |
| Engine knocks | Ride through the gears at speed | Worn piston and cylinder, wrong fuel octane, lean mixture, carbon build-up |
| Wheel does not spin freely | Raise the wheel and spin it by hand | Dragging brake or badly mounted pads, worn wheel bearings, bent axle |
| Clutch slips | Accelerate rapidly through first and second and watch rpm | Clutch out of adjustment, worn clutch discs or plates, weak clutch springs, contaminating oil additive |
| Steering is heavy | Tire pressure and steering head | Steering stem nut too tight, damaged steering head bearings, low tire pressure |
| A wheel wobbles | Bearings, rim, spokes, tires | Excess wheel bearing play, bent rim, improperly installed hub, bent frame or swing-arm, loose or broken spokes, old dry-rotted tires |
| Bike pulls to one side | Alignment and suspension | Wheels out of alignment, faulty shock, damaged fork, bent swing-arm, axle, frame or triple clamp |
Note: the manual says ignition timing is non-adjustable and that timing, valve timing and internal engine checks should be done by a qualified shop or FRP. Do not adjust the carburetor air/fuel mixture screw; it is set at the factory. Contact FRP Moto support before disassembling the carburetor or engine.
If something goes wrong on the trail
Stop as soon as it is safe, and do not keep riding on a flat tire, with an unusual noise, or if the bike does not feel right. For a small puncture use aerosol tire sealer or a tube patch kit; for a larger one replace the tube. If a front brake part fails you can ride back carefully using only the rear brake, and the reverse. After a crash, check that handlebars, levers, brakes and wheels are tight, and have FRP inspect the frame and suspension after a serious crash.
Safety, gear and legal
The FX140 is an off-road-only motorcycle for one rider. It is not street legal, and the manual says it is not equipped with the lights, turn signals or horn required on public roads, so it must not be ridden on streets, highways or in traffic. Minors must ride under adult supervision. See the kids dirt bike guide for fit and age by model.
Gear the manual recommends
- An approved helmet with a tight chinstrap (full-face gives the most protection; look for the DOT sticker in the USA or an independent test tag such as Snell) and eye protection.
- Sturdy off-road motorcycle boots and good-quality motorcycle gloves.
- Riding pants with knee and hip pads, and a jersey with elbow pads plus a chest and shoulder protector; long pants and long sleeves at minimum.
Rules from the manual
- Off-road use only. Dismount and walk the bike across any paved road.
- Never carry a passenger. Maximum load is 264.55 lb (120 kg).
- Do not ride under the influence of alcohol or drugs, at night, in rain or snow, or on slippery or unstable surfaces.
- Jumps, wheelies, reckless acceleration and unauthorized modifications are prohibited. Do not remove or alter the noise or emissions control parts; US law prohibits tampering.
- Stop the engine and let it cool before refueling. No smoking, and keep gasoline away from flames or sparks.
- Do not lend the bike to anyone who does not know how to operate it.
- Parents: judge riding readiness (physical ability, athletic ability, maturity), supervise every ride, and keep the bike maintained.
Shipping and warranty: FRP Moto does not ship the FX140 to California. For warranty terms and owner support see the FRP ownership promise; the manual states that not following its instructions can void the warranty and that competitive racing voids all warranties. Shipping details: shipping.
Videos and parts
FRP Moto's FX125 and FX140 "Assembly & Parts" playlist has one FX140 video: the assembly video embedded above. There are no FX140-specific repair videos in that playlist yet.
For replacement parts browse the FRP parts collection. The manual says to use only genuine FRP replacement parts. When you contact support, have the VIN ready: it is stamped on the right or left side of the frame or on the steering head tube. The engine model and serial number are stamped on the left side of the engine under the countershaft sprocket.
Where to go next
Support: FRP Moto customer service, csr@frpmoto.com, 833-970-3777 (toll free), Monday to Friday 8am-5pm PST. If you have any problem while riding, stop and contact support before continuing.