
TL;DR
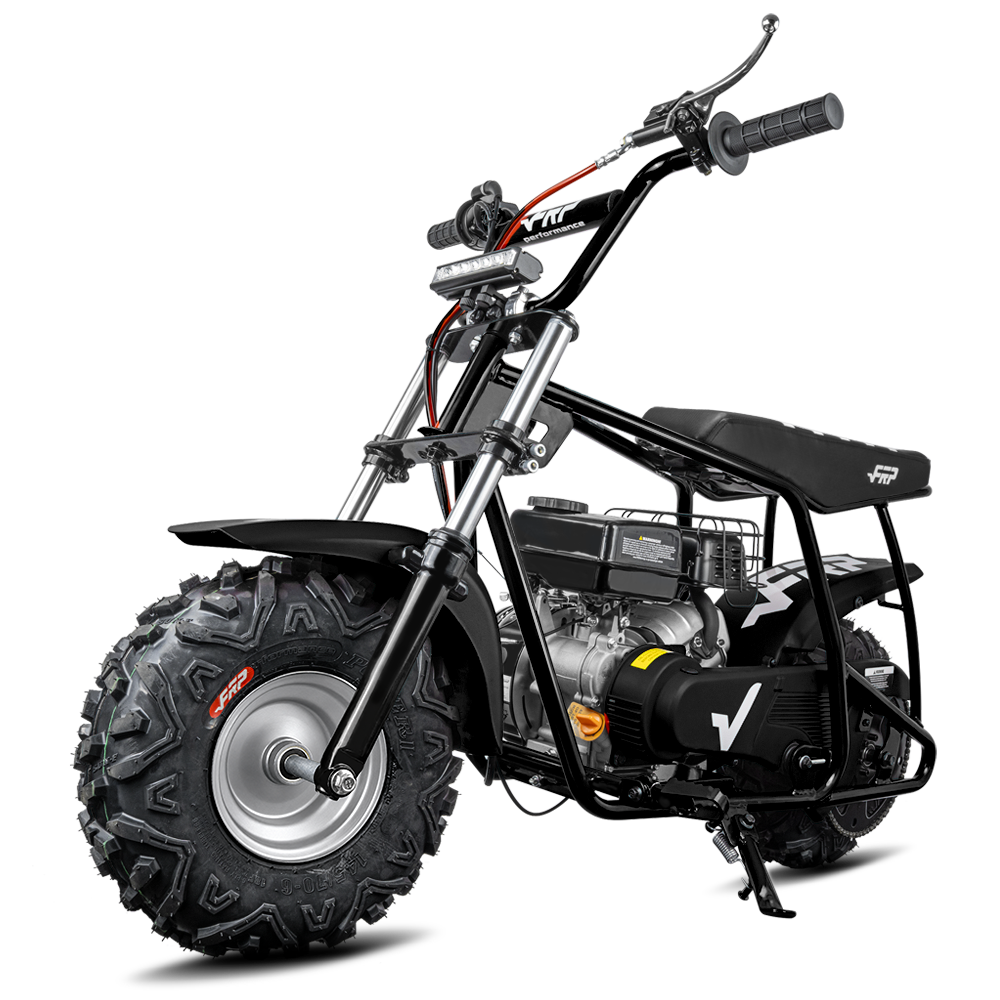
- The FRP GMB100 uses 10x2.125" tires front and rear — a very common size also found on the Coleman CT200U and many Chinese mini bikes.
- Correct tire pressure for most mini bike pneumatic tires is 12–18 PSI. Heavier riders (180+ lbs) should run the higher end; lighter riders can run less.
- Replacing a mini bike tire takes 20–45 minutes and costs $12–$25 per tire for standard tubes/tires, or $25–$55 for upgraded sizes.
- Fat tire upgrades (3.0"–4.0" width) provide better traction and stability on loose terrain but require wider rim compatibility and may affect handling on hard surfaces.
- The most common mini bike tire failure mode is not wear — it's puncture from riding on rough terrain. Having a spare tube ($6–$10) on hand is practical for regular trail riders.
Mini bike tires are less forgiving than you might expect. At 10–12" diameter with typical widths of 2.125"–2.5", there's not a lot of rubber between the rim and whatever surface you're riding on. Getting the pressure right, knowing when to replace, and understanding what "fat tire" actually means can make a meaningful difference in how the bike handles — particularly for heavier adult riders.
Mini Bike Tire Sizes: What Fits What
| Bike Model | Stock Tire Size (Front) | Stock Tire Size (Rear) | Tube Inner Diameter |
|---|---|---|---|
| FRP GMB100 | 10x2.125" | 10x2.125" | 10" tube |
| FRP GMB100P | 145/70-6 pneumatic (manual-listed) | 145/70-6 pneumatic (confirm sidewall) | 6" wheel/tire fitment; confirm current wheel version |
| Coleman CT200U | 10x2.125" | 10x2.125" | 10" tube |
| Baja MB200 | 10x2.125" | 10x2.125" | 10" tube |
| Mini Moto / Pocket bikes (110–150cc) | Varies 6.5"–10" | Varies 6.5"–10" | Varies |
| Most Chinese import mini bikes | 10x2.125" or 10x2.50" | 10x2.125" or 10x2.50" | 10" tube |
The 10x2.125" size is the dominant standard for adult mini bikes. The "10" is the wheel diameter in inches; the "2.125" is the tire width. Both front and rear tires on the GMB100 are the same size, which simplifies inventory — one spare tube and one spare tire covers both ends.
Tire Pressure: The Most Commonly Wrong Thing on Mini Bikes
Under-inflated mini bike tires are extremely common and have a disproportionate effect on handling and safety. Correct pressure for 10x2.125" mini bike tires:
- Rider under 150 lbs: 12–15 PSI
- Rider 150–200 lbs: 14–18 PSI
- Rider over 200 lbs: 16–20 PSI
Signs of under-inflated tires:
- Sluggish handling — the bike feels heavy and unresponsive in turns
- Wallowing or imprecise steering under braking
- Higher rolling resistance (the bike feels slower and harder to pedal/push)
- Visible squish on the tire sidewall when the rider is seated
Signs of over-inflated tires:
- Harsh, bouncy ride over small bumps
- Reduced traction on loose surfaces (the contact patch shrinks)
- Increased risk of tube pinch flats from hitting hard edges at speed
Check pressure before every riding session. A small tire pressure gauge fits in a pocket and costs $4–$8 at any auto parts store.
How to Replace a Mini Bike Tire
Tire replacement on a mini bike is simpler than a car or motorcycle because the wheels are smaller and lighter, but tube-type tires still require care to avoid tube pinching. You'll need:
- Tire levers (plastic, 2–3 of them) — $4–$8
- Replacement tube and/or tire
- Tire pressure gauge
- Pump (floor pump is easier than hand pump)
- Spray bottle with soapy water (helps mounting
Wheel Removal
For the rear wheel: loosen the axle nuts on both sides. The chain tensioner bolts (if present) will need loosening to allow the axle to move forward. Slide the axle forward enough to lift the chain off the sprocket, then lift the wheel out. For the front wheel: remove the axle bolt and lower the wheel out of the fork legs.
Tire Removal
Deflate the tube completely. Starting opposite the valve stem, use a tire lever to pry the bead over the rim edge. Work around the tire with additional levers until one side of the bead is off the rim. Remove the tube by pulling it out from under the tire — start at the valve stem.
To remove the other tire bead from the rim, use the same lever technique from the opposite side.
Tube Inspection
If you're replacing the tube due to a flat, inflate the old tube slightly and find the leak by listening or by submerging in water and watching for bubbles. Check the corresponding spot on the tire's inner surface for the cause of the puncture — a thorn, wire, or piece of glass that's still embedded will flat the new tube immediately.
Installation
Mount one bead of the new tire onto the rim first (this can usually be done by hand). Insert the new tube lightly inflated (just enough to give it shape). Align the valve stem with the valve hole in the rim. Work the second bead onto the rim by hand, saving the last section near the valve stem for last — this is the tightest spot.
Before fully inflating, check that the tube isn't pinched between the tire bead and rim. Inflate to 25% pressure and visually inspect all around the tire — the bead should be seating evenly. Inflate to correct pressure. Check for leaks at the valve stem and around the bead.
Tire Wear: When to Replace
Mini bike tires typically don't wear out from tread depletion the way road tires do (the speeds are too low). They typically fail from:
- Puncture: Most common, especially on trail and backyard riding. Fixable with a tube replacement ($6–$10).
- Sidewall cracking: UV and ozone break down rubber over time. Cracks that penetrate beyond the surface (you can see into the tire) indicate the tire should be replaced. Cost: $12–$20 per tire.
- Bead damage: Hard mounting impacts or mounting errors can damage the tire bead, causing it to not seal against the rim. Visible bead distortion means replacement.
- Tread wear: If you ride on hard pavement frequently, you'll eventually see tread wear. Most knobby mini bike tires last 2–5 seasons of casual use.
Fat Tire Mini Bikes: What Changes
Fat tire mini bikes use wider tires (3.0"–4.0" or more) on wider rims. The practical effects:
| Category | Standard 2.125" Tire | Fat Tire 3.0"–4.0" |
|---|---|---|
| Sand/loose dirt traction | Moderate | Better — wider contact patch |
| Grass and soft terrain | Acceptable | Better — more floatation |
| Hard packed/pavement | Normal handling | Heavier, slightly harder cornering |
| Rim compatibility | Standard 10" rim | Requires wider rim (not stock compatible) |
| Weight | Lighter | Heavier (adds 5–12 lbs per wheel) |
| Stability for heavy riders | Standard | Better — lower contact pressure per square inch |
| Cost to upgrade | N/A | $80–$200 for rim + tire set |
Fat tire mini bikes (like the Mega Moto-style fat tire builds) are better for sandy, loose, or soft terrain. For most backyard and flat trail riding, standard 2.125" tires on a well-tuned bike handle adequately. A fat tire upgrade makes most sense for:
- Riders over 200 lbs who feel the standard tires compress excessively
- Riders who specifically ride on sand, soft dirt, or wet grass
- Custom build projects where aesthetics are also a factor
Upgrading Tire Size on the FRP GMB100
The GMB100's stock 10x2.125" tires can be swapped for 10x2.50" tires on the stock rims without modification — this small width increase improves traction slightly without requiring new rims. Going wider than 2.50" on a stock GMB100 rim is not recommended (bead seating issues).
For a true fat tire upgrade on a GMB100-style frame, you'll need replacement rims sized for the wider tire. This is typically part of a larger suspension or frame upgrade project rather than a standalone tire replacement. See the GMB100 upgrade roadmap for the full upgrade path from stock to modified.
The GMB100 Platform — Tires and Parts Available

FRP GMB100 — $379
10x2.125" pneumatic tires · 10" rims · Standard PZ20 carb
Stock tire size is widely available and easy to replace. Compatible with aftermarket 10x2.50" tires on stock rims for a small width upgrade.
View GMB100 →
GMB100 Parts
OEM-compatible parts and accessories
Replacement parts including tubes, filters, chains, and components for the GMB100 platform.
Tire size is partly decided by the bike you own, so if you are still shopping rather than maintaining, it is worth checking wheel and tire spec up front. The FRP mini bike models list tire size per model — it matters more than most buyers expect once you start replacing consumables.
View Parts →GMB100P Tire Size and Pressure from the User Manual
The GMB100P user manual lists the tire as 145/70-6 pneumatic. If you own a 2026 limited or upgraded wheel version, confirm the tire sidewall and current product page before ordering a replacement, because wheel and tire packages can change by version.
For pressure, the manual recommends checking both tires when cold and inflating to 10 psi for normal operation. Do not check or add air while the mini bike is running. If the tire sidewall and manual differ, use the safer lower limit or contact FRP support before riding.
Frequently Asked Questions
What size tires does the FRP GMB100 use?
The GMB100 uses 10x2.125" tires front and rear on 10" rims. This is a standard size for adult mini bikes and is widely available from aftermarket suppliers. Tubes for this size are also commonly available and cost $6–$10 each.
How much air should I put in my mini bike tires?
12–18 PSI for riders under 200 lbs on standard 2.125" tires. Heavier riders (over 200 lbs) should use the higher end (16–20 PSI) to maintain proper handling and prevent tube pinch flats. Check pressure before each ride — mini bike tires lose pressure slowly but noticeably between sessions.
How do I fix a flat tire on a mini bike?
Remove the wheel (rear axle or front axle bolt). Use tire levers to remove one bead of the tire from the rim. Extract the tube. Inflate the old tube slightly to find the puncture (listen or use soapy water). Patch with a tire patch kit ($4–$8) or replace the tube ($6–$10). Reinstall, inflate to correct pressure, and remount the wheel. Total time: 20–45 minutes.
Can I put bigger tires on a mini bike?
You can go from 2.125" to 2.50" width on stock GMB100 rims without modification. Going wider (3.0"+) requires wider rims. True fat tire upgrades require purchasing new rim and tire sets compatible with the bike's frame and axle width. This is a meaningful modification that changes handling characteristics — plan it as part of a broader suspension or frame upgrade.
What is a fat tire mini bike?
A fat tire mini bike uses wider tires (typically 3.0"–4.0" or more) on wider rims. The wider contact patch improves traction on loose, soft, or sandy surfaces and provides better stability for heavier riders. Fat tire mini bikes are heavier and handle differently than standard mini bikes on hard surfaces. They're best suited for off-road and loose terrain riding.
How long do mini bike tires last?
For casual backyard and light trail use, 2–5 seasons depending on terrain and storage conditions. The most common failure is sidewall cracking from UV exposure (store covered or indoors), not tread wear. Inspect the sidewalls for cracks at the start of each season. Surface cracks are cosmetic; deep cracks that you can see into indicate the tire should be replaced.
How Do You Safely Seat a Mini Bike Tire Bead?
If a mini bike tire will not seat on the rim, do not use gasoline, body spray, starter fluid, open flame, or any flammable shortcut. Those methods can cause fire, burns, rim damage, tire damage, or a sudden pressure event in a garage or driveway.
The safe path is slower but much smarter:
- Confirm the tire size matches the rim.
- Inspect the rim lip and tire bead for damage.
- Clean dirt, old rubber, rust, or debris from the bead area.
- Use tire mounting lubricant or soapy water only as a lubricant, not as a fire-control plan.
- Inflate gradually with a proper air source and stay within the tire manufacturer's seating and pressure guidance.
- If the bead will not seat, stop and use a tire shop or mechanic instead of adding more pressure or heat.
A tire that is hard to bead may be the wrong size, too stiff from storage, damaged, or mounted on a rim that needs cleaning. If you want to reduce mounting guesswork, compare complete tire and wheel paths such as the FRP x SunF Street Tire Assembly, or choose the tire type that fits the riding surface: FRP x SunF Street Tire for hard surfaces or FRP x SunF All Terrain Tire for off-road use.
FAQ: Can I use starter fluid, body spray, or gas to seat a mini bike tire bead?
No. Do not use flammable sprays, gasoline, fire, or explosion-style methods to seat a tire bead. Use proper tire lubricant, controlled air pressure, and professional help if the bead will not seat.
FAQ: Why will my mini bike tire not bead?
Common causes include wrong tire size, a dirty or damaged rim lip, a stiff tire bead, low-quality tire construction, poor lubrication, or a bead that is not centered on the rim.
Flat Tire, Bent Rim, or Bead Leak: What Should You Do?
If a mini bike gets a nail in the tire, loses bead seal, or bends a rim during tire removal, do not keep airing it up and riding. A slow leak can turn into a handling problem, especially on hard turns, wheelie practice, or rough ground.
Check the problem in this order:
- Find the leak source: tread puncture, valve stem, bead seat, rim lip, or sidewall.
- Inspect the rim lip for bends, rust, gouges, or tire-tool damage.
- Confirm the tire size matches the wheel and is not stretched or pinched.
- Do not use fire, starter fluid, or flammable shortcuts to seat the bead.
- If the rim is bent or the bead will not hold, replace the wheel or use a professional tire shop.
- For less mounting guesswork, compare complete tire/wheel options and model-specific FRP replacement parts.
FAQ: Can I ride a mini bike with a slow tire leak?
No. A slow leak can reduce grip, damage the tire, break the bead seal, or make the bike unstable. Find the leak and repair or replace the tire, tube, valve stem, or wheel before riding.
FAQ: What if a tire shop says my mini bike rim may bend during tire removal?
Stop and inspect the wheel before forcing the tire off. Some small rims can bend if the tire is stiff, the bead is stuck, or the wrong tools are used. If the rim lip is already damaged, replacement may be safer than reusing it.
FAQ: Why does my mini bike tire bead keep leaking?
Common causes include a dirty rim lip, bent rim, damaged tire bead, wrong tire size, valve-stem leak, or poor seating. Clean and inspect the bead area, then replace damaged parts instead of adding extra pressure.